The Plan
Well the plan was to snag our first California 14er, Split Mtn. by the Red Lake Approach. After doing much research online, including many different ideas on how to get to the trail head, I bought a USPS map of the area. However, this map turned out to be enormous (24 by 40 in.); somehow they messed up my order. After our team (numbering 6) all met together in So Cal, we packed up our gear and food.
Day One
Waking up at 4 a.m., we drove up to Lone Pine and grabbed our permits from the Eastern Sierra Inter-agency Visitor Center, seeing the crowd awaiting the doors to open at 8 a.m., presumably to get Whitney permits. After this, we drove up to Big Pine, and after getting gas (right at the intersection of 395 and Glacier Lodge Rd.), we headed up towards the Sierras.
Note: Glacier Lodge Rd. is also called Crocker Rd., which can be really confusing. Also, the sign is hard to see if you are driving fast through Big Pine (which you shouldn't anyways).
After driving up Glacier Lodge Rd. for a while, we took a hard left onto McMurray Meadows Rd., which was also a bit hard to find (we went past it and had to backtrack to find it). Almost directly when you get onto McMurray, you have to yank a quick left which counter-intuitively leads you away from the Sierras. It soon turns again to the West, and the road widens into a long, flat, straight, and relatively smooth dirt road. After about 20 minutes of this scenic and fun road, you need to turn a drastic right, which then faces straight to the West. There is a gate here, but it has no lock and doesn't say anything about private property. We soon discovered why the gate was there as 3 large cows walked across the road. Don't drive too fast or that could be bad. You will see the cutoff to Birch Lake TH on the right, but don't take it. The road takes a left, and you travel along it due South for about 5ish minutes. This is where the fun begins, the road begins to slowly turn to the East and lose (frustrating) elevation you just gained. The road here gets tricky with a lot of bumps and uneasy terrain. I was fine in my 1999 Honda CRV. Just watch out for big rocks. Follow this until you hit a farmers fence, where you take a hard right. You drive parallel to the fence for about 10 minutes, until you come across the last fork you have to deal with. Take a right, and then you just head up East towards the obvious canyon out of which a stream flows (seen by the green brush following the course of the stream).
I printed out this map by Piero Scaruffi: http://www.scaruffi.com/monument/hikes13/map003.jpg which ended up giving pretty good directions. ![]()

![]()
![]()
![]() This is a picture taken from the real trail (which is on the ridge facing the Owens valley). You can see the Trail-head in the bottom right, and the approach road snake its way to the left. You can see the private property that you drive next to in the middle left of the picture.
This is a picture taken from the real trail (which is on the ridge facing the Owens valley). You can see the Trail-head in the bottom right, and the approach road snake its way to the left. You can see the private property that you drive next to in the middle left of the picture.
We finally arrived at the TH about an hour out of Big Pine, and packed up. There were about 5 other vehicles parked at the TH but we never saw anyone from those cars. We then tried to figure out where the trial started. In the picture above, you can see a road leading to the left of the TH in a straight line. GO THAT WAY, THAT IS THE REAL TRAIL. We didn't, but just started straight up the canyon, along a use trail. If we had looked at our maps closer, it would have saved us a lot of pain later. The trail got steadily sketchier as we gained altitude. We were spurred on by our friend Joel, who led us in 'jodies,' where he would lustily sing a line which we would all repeat. It might seem dumb, but time passed very quickly. It was hot out, and we went down to the stream to refill our water. After this short break we hiked for a few minutes until we were stopped by a two-way fork in the stream. I had read on blogs that you need to go to the right of this fork. Unfortunately, there are three canyons that separate from this point. The stream goes up to the right and left, and there is a middle option devoid of anything except shrubs. Although my gut told me the right option was correct, the group as a whole thought it turned too far to the North and that the middle option looked best, as we didn't have to bushwhack up the canyon. Also, I thought I could see Split Mtn. from this point rising above the middle canyon, but I later learned that this was a similar looking sub-peak of Cardinal Mtn. to the South of Split. We braved our way through the brush of the stream, and emerged bruised and tired on the other side. We then pushed straight up the center canyon.
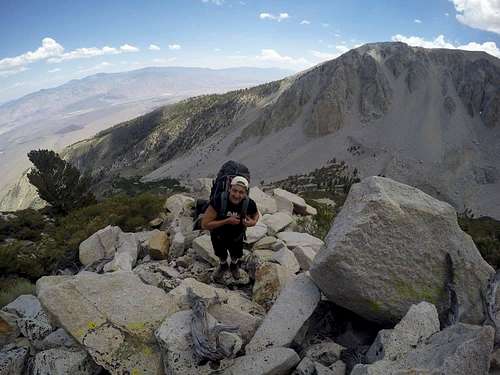
![Unnamed Image]() Here is a picture looking down the canyon after we had just crossed the stream. The real trail is on the other side of the stream on the left.
Here is a picture looking down the canyon after we had just crossed the stream. The real trail is on the other side of the stream on the left. We pushed up this canyon, and soon realized there was no trail. After pushing through brush and scrambling up boulders, I realized we were on the wrong side of the canyon, and that nothing but cliffs awaited us above the way we were going. It was also getting late in the day, but we fortunately found a great campsite with water, trees, and shelter in a moraine bowl. We tented here for the night and discussed plans for the next day.
Day Two
We realized we were on the wrong side of the ridge, and that we needed to cross a tall ridge to the North to gain the real trail up to Red Lake. This was the most difficult day on the trip, as we had to literally scramble up Class 3 terrain with our heavy backpacks all day. It took us about 3-4 hours to gain the ridge, and then it started to rain. Great. We quickly climbed down a rockfall on the North side of the ridge and regained the real trail. It was great to be back on the real trail, and we easily hiked up to Red Lake in an hour.
![Unnamed Image]() Miles gaining the ridge with a shoulder of Cardinal Mtn. in the background
Miles gaining the ridge with a shoulder of Cardinal Mtn. in the background
We set up base camp on the West Side of Red Lake and made plans to get up nice and early in the morning.
Day Three
This was the big day! We got up at 330 am and hiked quickly up the rocks to the bowl on Split's Northern flanks. We then tried to head toward the saddle between Mt. Prater and Split Mtn. We gained the ridge, and then looked down and saw this:
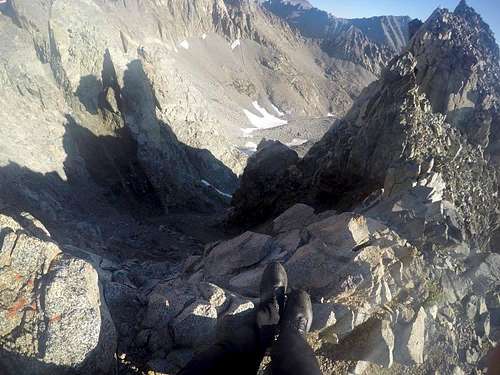
![Unnamed Image]() The chasm before the Split-Prater saddle
The chasm before the Split-Prater saddleWe then traversed up to the left, and followed the steep ridge until we found the Class 3 chute I had read about. This was a bit sketch, and I think if you seriously tripped you could fall for a long way. After gaining the plateau above the chute, the way was clear up the North face of Split. Great views from this point on.
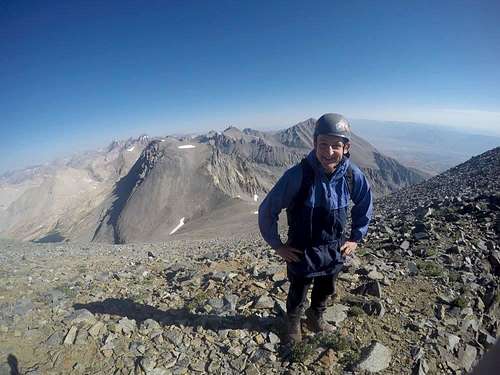
![Unnamed Image]() Miles on the North Face of Split. Prater, Bolton Brown and the Palisades visible in the background
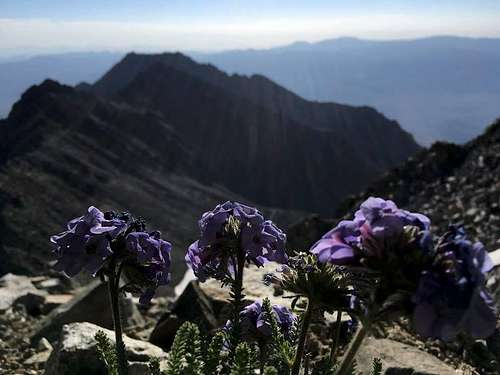
Miles on the North Face of Split. Prater, Bolton Brown and the Palisades visible in the background![Unnamed Image]() Polemonium flowers with Mt. Tinemaha in the background
Polemonium flowers with Mt. Tinemaha in the background
At about the 13,900 ft. level, the elevation started to get to me, as the highest I had ever been before was Banner Peak (12,945). I struggled up to the top with my three companions on my heels. We tested out my new Motorola walkies, which worked great from the summit of Split down to Red Lake where our other companions were.
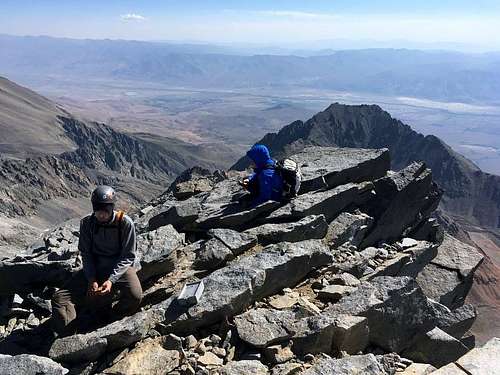
![Unnamed Image]() Me and Andrew up on the top
Me and Andrew up on the top
![Unnamed Image]() Palisades on the right
Palisades on the right![Unnamed Image]() Palisades on left, Prater and Bolton Brown in the center, and Birch Mtn. on the right
Palisades on left, Prater and Bolton Brown in the center, and Birch Mtn. on the right
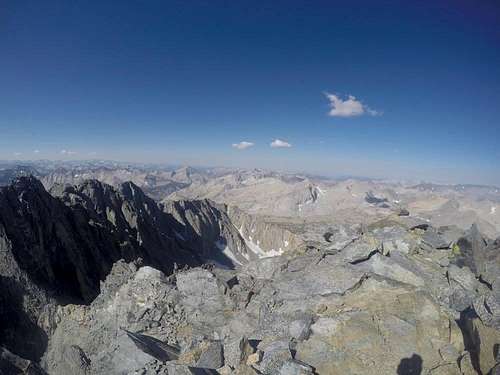
![Unnamed Image]() Looking to the Southwest
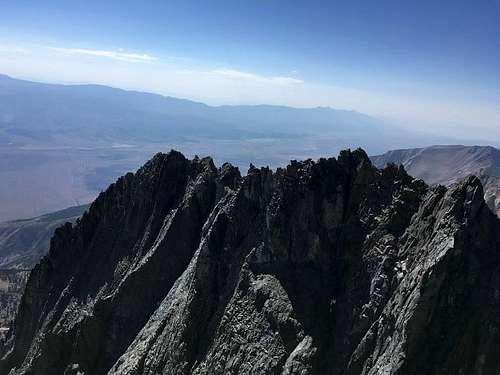
Looking to the Southwest![Unnamed Image]() Other part of Split Mtn. Would love to climb up there someday
Other part of Split Mtn. Would love to climb up there somedayWe hiked down, with half of our party (not including me) reaching Red Lake before 11 am. It was a beautiful day, and the views stunning. We swam in Red Lake, which was freezing, and then headed home!
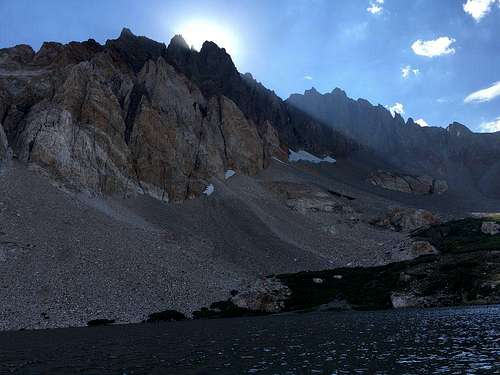
![Unnamed Image]() Sun rays coming through the gap in Split Mtn.
Sun rays coming through the gap in Split Mtn. Thoughts
I learned a lot this trip, including that when your gut tells you something, don't disregard it. I'm not saying you should blindly follow your gut feelings, but never ignore them. We got lost, and had to climb up a huge ridge just to get back on track. However, this built character in each member of the group and bonded us together. This reminds me of life, how so many times it seems that we get side-tracked (we get injured, or we lose our job, etc...) but it really ends up making us who we are. The mountains are full of such analogies if one takes the time to engage them.
Split Mountain was my first 14er, and it proved to be easier than I thought. Except for the Class 3 chute, this was a very straight-forward and easy climb. I think that the difficulty of finding the TH as well as the approach confusion makes Split Mtn. a greater prize. You really feel like you accomplished something when you stand on its summit.


Comments
Post a Comment