
-
 9898 Hits
-
 85.87% Score
-
 21 Votes
|
|
Route |
|---|---|
|
|
36.11308°N / 115.49892°W |
|
|
Scrambling |
|
|
Spring, Fall, Winter |
|
|
Most of a day |
|
|
Class 4 |
|
|
Overview
Less than a mile separates the summits of Gunsight Notch Peak and Juniper Peak, but it seems that most people reaching one do not go to the other on the same outing, or at least not by traversing. Perhaps this is because there is not a lot of beta out there on the traverse route. Perhaps it is because some of the beta that is out there mentions a rappel, which is probably more than most people want to bother with on a day that otherwise is not more difficult than Class 4.
The bad news: there is indeed a rappel (going from Gunsight to Juniper).
The good news: there is a Class 4 workaround that is nearby, meaning you can complete both peaks and leave the rope, etc. at home.
What is really nice about doing both peaks together is not only that they are close to each other but also that the standard route for each begins from the same trailhead. So why not do both and make it a loop?
Getting There
From Summerlin, follow Charleston Boulevard (SR 159) west to the entrance to the Scenic Loop through Red Rock Canyon National Conservation Area ($7 per vehicle entry fee as of Summer 2013). Drive 10-11 miles to the large, signed parking area for Pine Creek Canyon.
159 is also accessible from the west via SR 160.
Route Description
Because of the workaround that takes away the need to rappel, one can do this route in either direction. However, I am describing it from Gunsight to Juniper for the following two reasons:
- It is the way I went.
- The standard route up Gunsight is more challenging than the standard route up Juniper, thus making it more enjoyable to go up Gunsight and down Juniper. On the other hand, the workaround is probably more fun going from Juniper to Gunsight since the trickier spots involve downclimbing when going the other way.
There are SP pages detailing the standard routes for Gunsight and Juniper, but for the sake of simplicity for page users, I will cover that information here as well.
RT distance is 5-6 miles with around 2500' of elevation gain by the time it's all over. Experienced scramblers in good shape can do this route in a few hours, but most people should at least plan for about 6 hours.
First Leg-- Gunsight Notch Peak
The following is copied from the route page, which I have adopted and updated.
To get to Juniper Canyon, simply follow the RRCNCA (Red Rock Canyon National Conservation Area) Scenic Loop about 10 miles to the signed Pine Creek Canyon turn-off. There’s plenty of parking here, as this is one of the busiest trailheads in the park.
From the parking area, follow the trail toward the mouth of Pine Creek Canyon. For those unfamiliar with the mountains and features of RRCNCA, the impressive little pyramidal peak in front of you is Mescalito. Anyway, after about a mile of trail, you will come to the remains of an old homestead on the left. It’s fairly easy to miss, so keep your eyes open for it.
From the old homestead (mainly just a foundation, really), look for a faint fork in the trail. Follow the left fork, crossing Pine Creek in the process, and travel the signed Arnight Trail, which will take you to the south toward the mouth of Juniper Canyon.
As the trail takes you toward the mouth of Juniper Canyon, follow any number of use trails that ultimately take you in.
Notes by new page owner: The old homestead foundation is easy to miss. Also, it is not necessary to hike as much as a mile. Actually, it is only necessary to hike about a half-mile before leaving the main trail and accessing the best trail into Juniper Canyon. Please see the pictures and captions below for additional information.
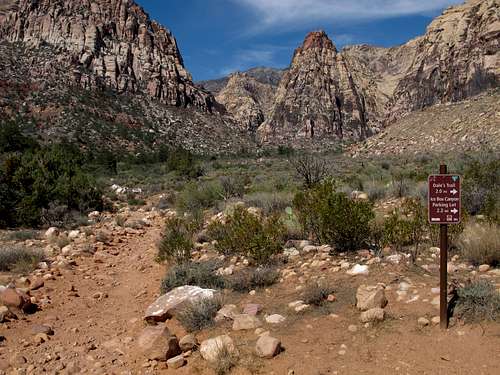 Less than half a mile from Pine Creek Canyon parking, you will reach this junction. Keep straight; just a few minutes after this junction is the key spot if you are headed for Juniper Canyon. | 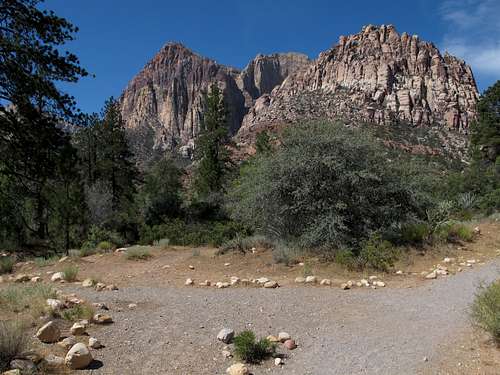 There are many use trails going off from Pine Creek Canyon to Juniper Canyon, but if you leave Pine Creek Canyon here and then cross the drainage, you can find a good use trail that leads to Juniper Canyon and stays high as you enter that canyon. It lets you avoid the brush in the wash and ultimately deposits you into the canyon where the scrambling begins. Getting into the canyon lower and earlier is going to be a mistake because it will mean negotiating brushier terrain. |
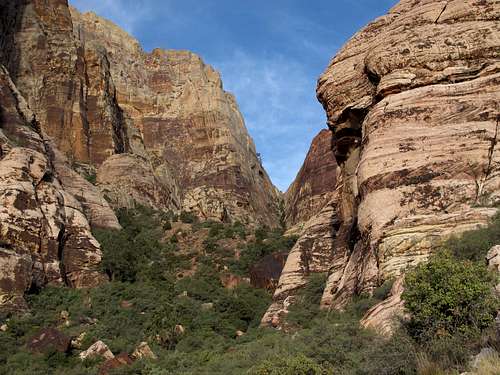
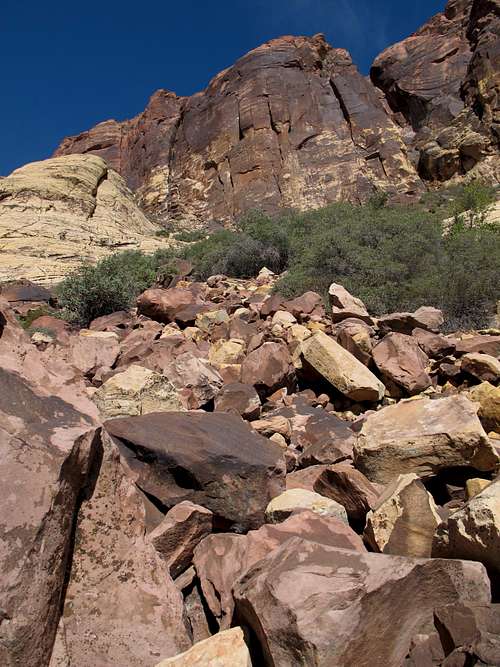
You are now in Juniper Canyon. The big walls above you and in the distance are Rainbow Wall (left) and Brownstone Wall (right). Looking up-canyon between those two prominent sandstone walls is a notch, way up high – this notch is known as Gunsight Notch. You’re aiming for it.
Climb to the top of the notch to reach Gunsight Notch Peak. The route is not as brushy as it looks from this view, but there are some brushy sections as well as some Class 4 spots. The last bit is going to be a tight squeeze for a lot of people but is technically easy.
Head up-canyon, following cairns, use trails, and/or the path of least resistance, and ultimately make your way toward the notch. The going is straightforward, as you simply need to follow the main watercourse up into the deep parts of the canyon toward the obvious notch above.
Obstacles encountered along the way are fun and typically present only minor scrambling difficulties. As you get deeper into the canyon, not too terribly far from the notch, you will encounter the crux of the day - a 12-15 foot chimney (class 4). Good scrambling gets you up it. I’m told that there is an easy tunnel nearby that allows you to bypass the crux, though I didn’t notice it when I did the route. New page owner's note: the tunnel is actually just a few yards beyond the chimney; it's not hard to see but easy to miss if your focus is all on the chimney problem.
Beyond the chimney, continue up over class 2-3 terrain to the notch. Once there, the notch itself is gained via class 2 terrain.
From the notch, hang a right (north) and follow the path of least resistance (class 2-3) up to the summit a short distance away.
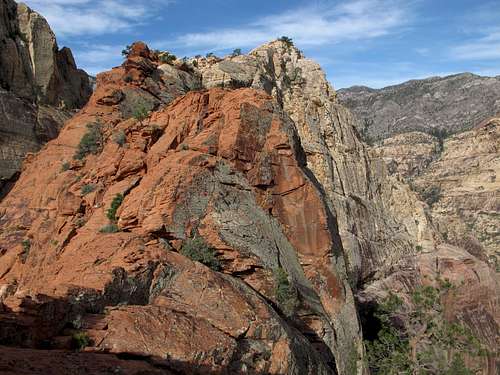
![Looking Back to Gunsight Notch Peak]()
![View W on Ridge between Gunsight and Juniper]()
By MoapaPk-- Matt and Jeff pose for perspective.
![Red Rock in Red Rock]()
An outcrop framing Rainbow Wall as seen from the Gunsight-Juniper traverse.
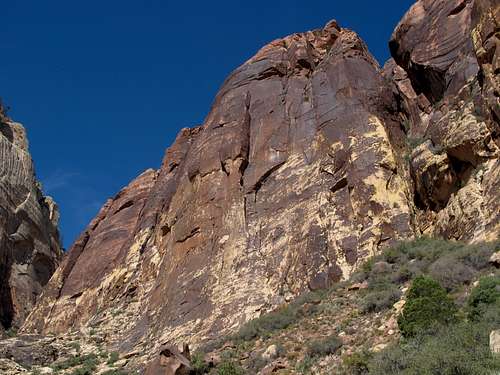
![Brownstone Wall]()
Obstacles encountered along the way are fun and typically present only minor scrambling difficulties. As you get deeper into the canyon, not too terribly far from the notch, you will encounter the crux of the day - a 12-15 foot chimney (class 4). Good scrambling gets you up it. I’m told that there is an easy tunnel nearby that allows you to bypass the crux, though I didn’t notice it when I did the route. New page owner's note: the tunnel is actually just a few yards beyond the chimney; it's not hard to see but easy to miss if your focus is all on the chimney problem.
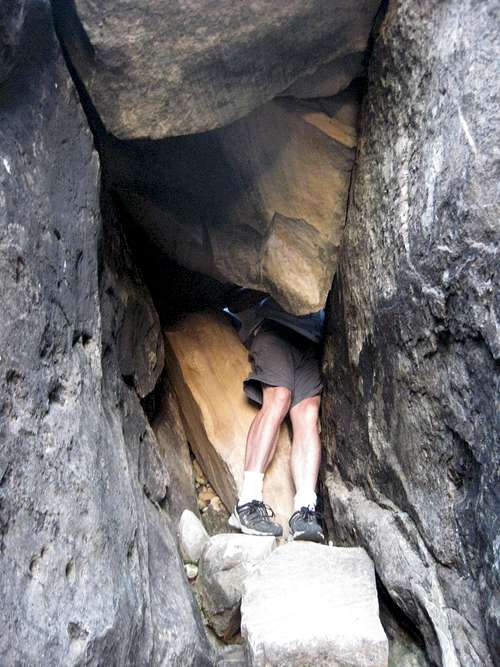 By MoapaPk-- This is a view West to the bottom of the tunnel under the chockstones. | 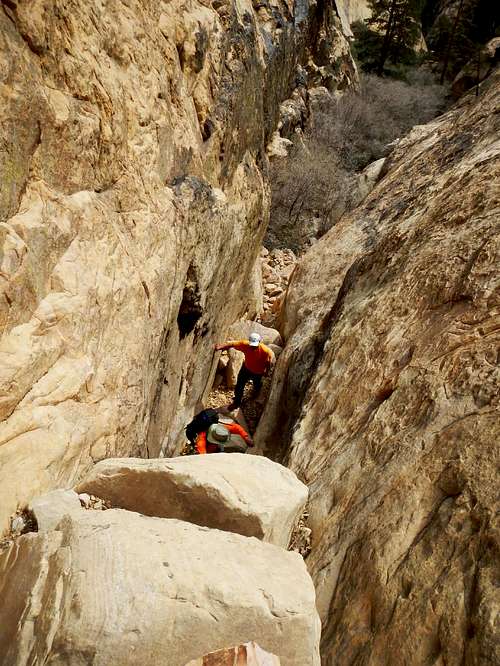 By MoapaPk-- I'm standing on top of the last (highest) obstacle, looking east and down on Matt H and Jeff A. There is a tunnel under these chockstones, emerging to west near some bushes. Often one will find rappel slings tied off the bushes near the upper tunnel entrance. In "the old days" we chimneyed by the chockstones; a very exposed difficult chimney for a short person. |
Beyond the chimney, continue up over class 2-3 terrain to the notch. Once there, the notch itself is gained via class 2 terrain.
From the notch, hang a right (north) and follow the path of least resistance (class 2-3) up to the summit a short distance away.
Second Leg-- Gunsight to Juniper
Except for the rappel and the workaround, the traverse is just a matter of following the ridge, with hiking most of the way and up to Class 3 scrambling at other times. Cairns sometimes point the way but are unnecessary, so don't worry about finding them.
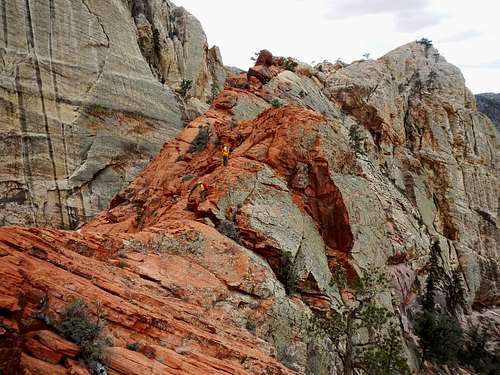
By MoapaPk-- Matt and Jeff pose for perspective.
Enjoy the red outcrops along the ridge and the spectacular views of Rainbow Wall.
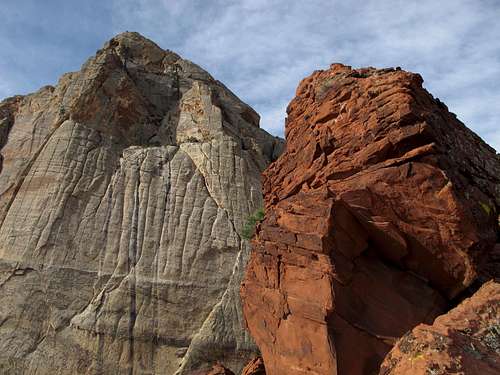
An outcrop framing Rainbow Wall as seen from the Gunsight-Juniper traverse.
Just as Juniper Peak is looking really close and you start thinking that reports of a rappel are all wrong, you come to the prominent notch between the two peaks (on topo maps, this is the saddle shown as being closer to Juniper than to Gunsight-- note that neither peak is named on maps and that you must know where they are). At the edge of a high cliff, find a rappel location that likely has several slings (remember that no one can guarantee the reliability of these slings).
Photos and captions below from MoapaPk--
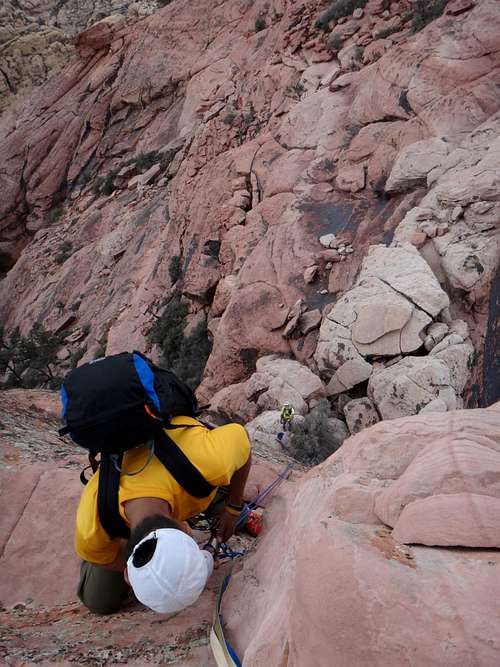 Jeff A edges carefully off the rap station. I am down below, offering a belay. The vertical distance is just 40', but you will need at least 100' for a double-strand; 110' allows a safer stance for belay. The bottom landing is on a sharp ridge itself.(courtesy Matt H) | 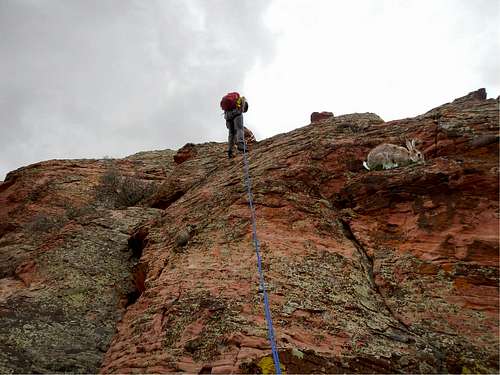 Another view of Rap down Gunsight-Juniper Ridge. Normally I don't take pictures when I belay, but this was a special request. ;^) | 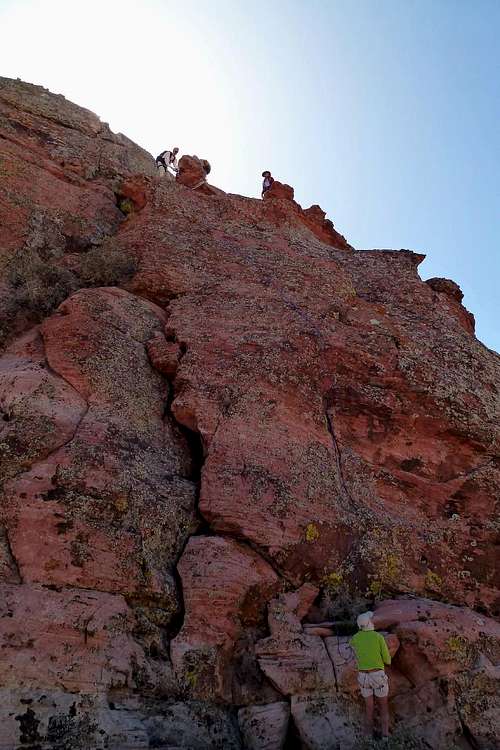 I would like to make a better upper rap station; currently the take-off is awkward and a bit diagonal. There was a rat's nest of old webbing up there; we cut some down, but be prepared to replace some next time you go.This time I had just 100' of 8mm, so my bottom-belay stance was a bit awkward.(courtesy Candace W) |
Unless you are going to rappel this pitch, backtrack a bit and look for a series of ledges and outcrops that will allow for a descent on the left (west) side of the ridge. At first, you will be moving toward the notch but will end up heading the opposite direction. Approximately directly below where you left the ridge above, find a chimney/corner that will allow access to easier ground below. Class 4 scrambling and downclimbing does the trick on this part of the route. Warning: use extreme caution here. The way is not simple to find (I have already heard from some very experienced climbers who were not able to find the correct way on their first try), it is often exposed, and it is very easy to suddenly find yourself in a precarious spot, whether you are going the correct way or not.
Once you scramble over to the saddle and are below the rappel location, the rest of the way is easy and fast scrambling to Juniper's summit.
Unfortunately, I do not have photos of the rappel workaround. Not sure as I was going along what might work and what might not, I did not take pictures. But the description above should give you a pretty decent sense of what to do and save some more of the fun for you.
Third Leg-- Juniper Peak to the Trailhead
The page for the standard route on Juniper Peak is, in my opinion, detailed to the point that it might actually be confusing to some people when the route is actually much easier to find and follow than it sounds.
My remarks: From the summit, descend between two large outcrops and find cairns/use trail dropping toward the Pine Creek Canyon side of the peak. As you are beginning to wonder whether you are beginning a route dropping into that canyon, notice a steep gully on the right. Descend this gully, which is heavily cairned, apparently in case you are confused about whether the only obvious route down this side of the mountain is the right one. Eventually, the terrain opens up onto slickrock slabs. Continue descending steeply, gradually working your way to the right a bit. Again, you will notice a lot of cairns, and sometimes there are cairned routes in other spots, which serve as a reminder that there is no one way down. Just continue descending, with a large, dark wall (Brownstone Wall) on your right.
As you get closer to the canyon floor, you may, depending on your exact course, have to briefly crash through brush, but you ultimately are aiming for a small talus field that is easy to see from above. Cross that boulder field and then continue descending via use trails or what otherwise seems to be the path of least resistance until you regain the canyon floor. Then hop and scramble the boulders until you get back to the use trail you took over from Pine Creek Canyon.
The photos below are provided mainly to help anyone ascending via Juniper Peak, but they might prove useful to anyone going the way I have described as well. However, due to all the cairns and the nature of the terrain, it really is pretty hard for anyone with decent route-finding skills to not find the right way down from Juniper Peak.
 The talus field | 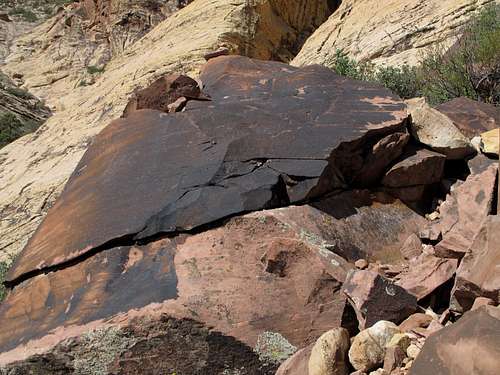 The upper end of the talus field | 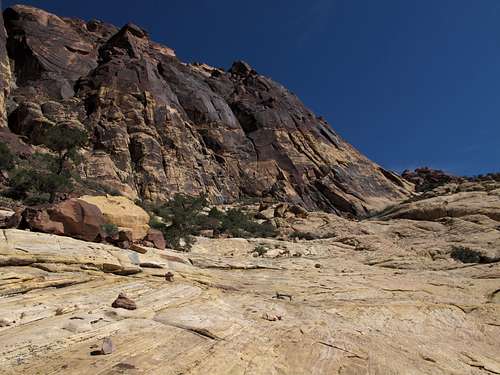 To/from Juniper |
Essential Gear
Just good hiking shoes or boots and plenty of water unless you are going to rappel, inwhich case you need at least 100' of rope and the other necessary gear.When to Climb
Although I did this in summer, most people would advise against that because of the heat. Temperatures often top 100, and the sandstone can become like an oven by noon. If you do go in the summer, start as early as possible (about 6:15 since the gates to the Scenic Drive do not open until 6).You might encounter icy spots in the canyon during the winter.
Spring and fall are best.
Karlew5ki - Jun 30, 2021 10:28 am - Hasn't voted
Here's a Cool Variation from Juniper to Gunsight.Full video coverage can be found here of the variation climbing up Juniper and making the ridge traverse to Gunsight notch via easy 5th Class climbing, then descending Terrace canyon! https://youtu.be/QcGva0NZEVk