
-
 17863 Hits
-
 82.17% Score
-
 15 Votes
|
|
Route |
|---|---|
|
|
40.28030°N / 105.6725°W |
|
|
Trad Climbing |
|
|
Spring, Summer, Fall |
|
|
Most of a day |
|
|
5.8 (YDS) |
|
|
8 |
|
|
III |
|
|
Approach
See the main page for more approach details. Park at the Glacier Gorge Trailhead in Rocky Mountain National Park and hike past Loch Vale to Sky Pond (about 4 miles). The normal approach leaves the trail just before the lake and heads toward the spires to the right up a talus field.
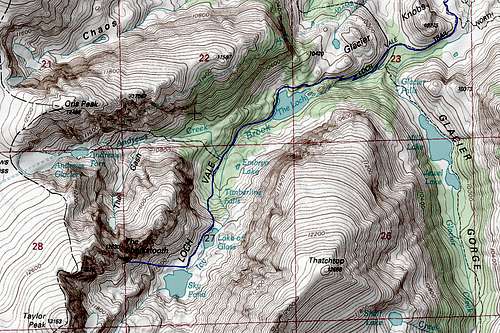
Map of the approach to Petit Grepon with the route in blue. Petit Grepon is the black dot.
Route Description
The first half of the route follows a major chimney system in the middle of the south face. From there, it diagonals right and ascends the southeast corner of the pinnacle. Begin 100 ft left of the low point of the main chimney. If you are switching leads with your climbing partner, try and convince them you want to lead the first pitch despite it ease. The best pitches on this climb are Pitches 3, 5, and 7 with Pitch 5 being the crux.
Below is a description of the climb:
| Pitch | Photo | YDS | Vertical Length | Description |
| 1 |  Looking up P1 | 5.3 | 180 feet | Locate one of many easy routes up from the base of the route and continue for 200 feet to the First Terrace (a prominent ledge). Make your own anchor here. |
| 2 |  Looking down P2 | 5.6 | 130 feet | Enter the huge chimney and pass a chockstone on the left. Continue to the top and climb out to the left. Belay on a tiny ledge above the chimney at the base of the left leaning large crack. There is a fixed cam here you can utilize. |
| 3 |  Looking up P3 | 5.7 | 100 feet | Follow the crack up and to the left to the Second Terrace which is at the base of a smaller chimney. It's kind of awkward to follow with a pack on so try and convince your partner to lead this one! |
| 4 | 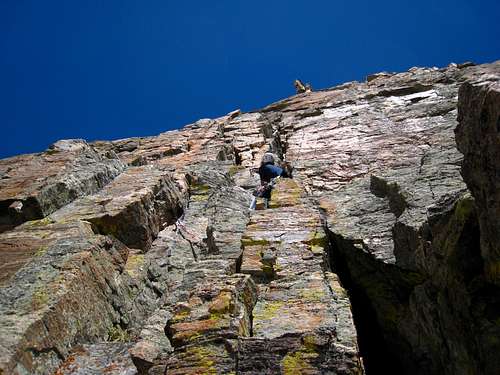 Looking up P4 | 5.6 | 110 feet | Continue up the smaller chimney (5.5), then angle right beneath a right-facing dihedral on blocky terrain and continue to the right on a 3 foot wide sloping ledge to a belay at a double piton just below the crux. |
| 5 |  Looking up P5 Crux | 5.8 | 120 feet | Angle up and right along a thin crack (5.8+) and mantle onto a ledge with a overhang above and work slightly right. Step right into a steep finger crack dihedral and follow it to a large grassy ledge on the east face (5.8). This is the crux of the route and is fairly sustained 5.8. Make your own anchor. |
| 6 | 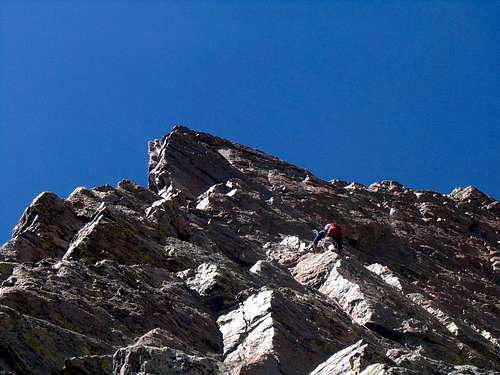 Looking up P6 | 5.7 | 130 feet | Meander up the east face on a long pitch. Protection is a little sparse. Stay at least 30 feet from the southeast corner until the very end of the pitch. Now traverse left to a small stance on the corner of the spire (this is the famous Pizza Pan Belay and there is a couple fixed pitons here). |
| 7 | 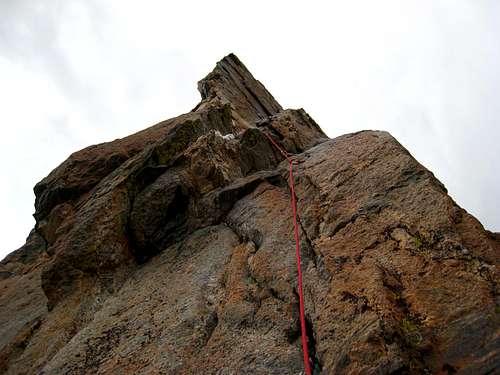 Looking up P7 from Pizza Pan Belay | 5.7 | 170 feet | Jam a thin crack (5.7) above the belay to regain the east wall. Angle up and right on nice juggy ledges all the way to the crest of the ridge where you will find a big boulder on the crest and a nice place to sit and belay. If you climb all the way to the ridge crest this is a long pitch. Make your own anchor. |
| 8 | 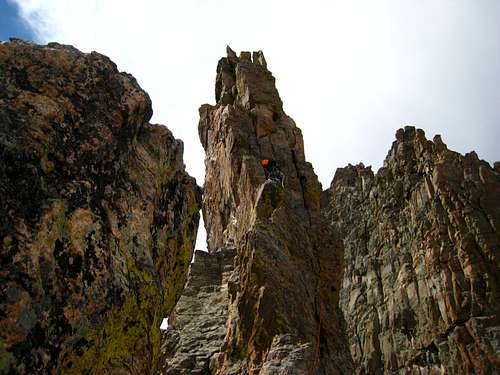 Looking up P8 and the summit | 5.6 | 70 feet | Traverse along the ridge (5.6), and follow that to the right to the summit staying to the right of the crest on the final 40 feet. Do not traverse below the ridge to the left of the summit. |
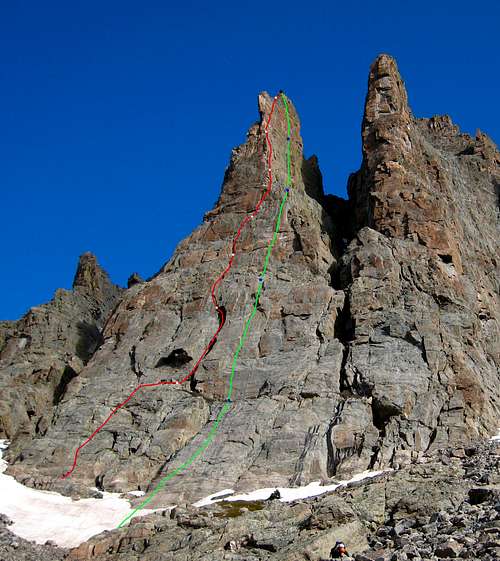
Our ascent route in red with the white dots marking anchored belays. Rappel route in green with blue dots marking approximate locations of bolted rappel stations
Descent
The descent of Petit Grepon is now completely bolted. If you rappel on anything other than bolts you are doing it wrong!!! You will need two 60 meter ropes to make all the rappels.
From the summit, walk a very exposed 30 feet or so to the NE end of the summit and locate a pair of shiny bolts. From here it is 5 rappels to the ground. Contrary to what has been posted elsewhere, it is not 6 rappels and the so called "Fatty Metolius bolts" were never found nor are they needed. Below is a description of the descent route from the summit:
| Rappel | Photo | Vertical Length | Description |
| 1 | 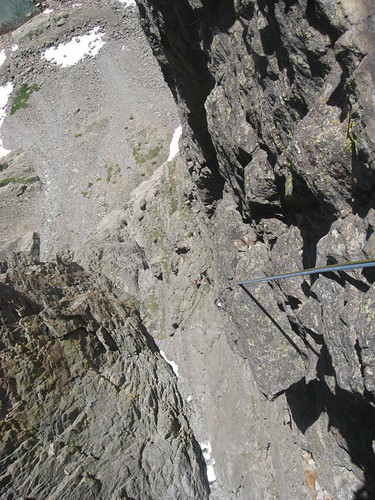 Looking down R1 | 160 feet | Rap from the shiny bolts at the northeast end of the summit. Try to work slightly to the climbers left and locate the second set of bolts on a small ledge. |
| 2 | 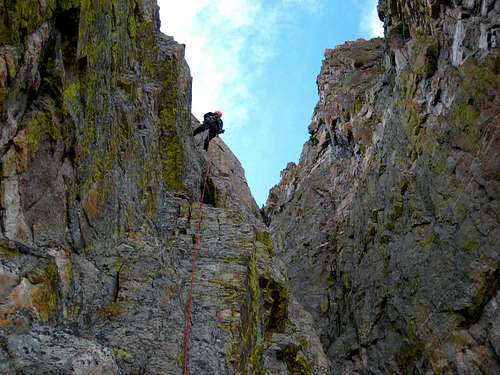 On R2 | 170 feet | Rap from the second set of god bolts to the large grassy ledge below. Pass by some old slings around a chalkstone on the way down. Once on the ledge walk 50 feet along the ledge to the south and locate the next anchor above a chimney. It's exposed clipping the anchor. Do not rappel into the huge gully below! |
| 3 | 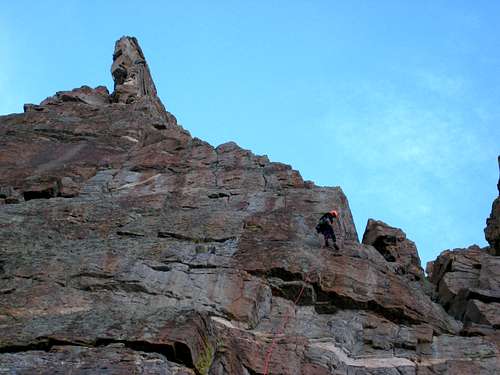 On R3 | 180 feet | Rap from the anchor over the void. One of the hangers is homemade hanger and the other is a modern ring bolt. Pass up the large grassy ledge (Second Terrace) at about 160 feet and aim for the big horn about 20' below. Just below this horn are the next bolts and there is a small ledge to stand on |
| 4 |  Finishing R4 | 200 feet | Rap from the bolts just below the second terrace down over a vertical drop to the first terrace which is the huge ledge at the top of the first pitch. The final set of bolts is about 30 feet to the climbers right. This is the longest rappel and your double 60 meter ropes should barely make it. |
| 5 |  Beta Pic | 180 feet | Rap from the final set of bolts to the ground. This final rappel brings you very close to the start of the route so you do not have to carry all your gear up the climb. You can pick up extra approach gear you left at the base after this final rappel with only a few minutes of extra effort. Watch for the goats and marmots who like to chew up gear though! |
Essential Gear
Two sets of BD Camelots 0.3" - 3", a set of stoppers and hexes up to three inches will get the job done. Helmets are recommended as always. Lots of people on this route. Snow is found on the approach until mid-June so ice axes, snowshoes, crampons etc. may be needed in early season.