

-
 33985 Hits
-
 78.54% Score
-
 10 Votes
|
|
Route |
|---|---|
|
|
39.64280°N / 105.8208°W |
|
|
Mountaineering |
|
|
Half a day |
|
|
Med. Snow |
|
|
Approach
NOTE:
Mid- to late spring is prime time for Colorado’s snowy couloirs (“couloir” is a term of French origin that refers to the deep, often steep gullies that cut into a mountain). While avalanche danger isn’t completely gone, the warmer conditions and prolonged sun exposure in spring stabilizes snow fields, making them much less likely to slide. When conditions are at their best, climbers are treated to literally thousands of vertical feet of accommodating snow, perfect for kicking in crampons, thus creating a personal staircase to the summit. And for lower-angle couloirs, the heat of the afternoon sun can soften conditions enough to enjoy an exciting glissade (sliding on your butt) down the length of the gully.
If the prospect of challenging these ephemeral snow lines appeals to you, read on to learn how to get started in this exciting method of scaling the mountains.
================================================================================================================================================
|
|
|

|
|
|
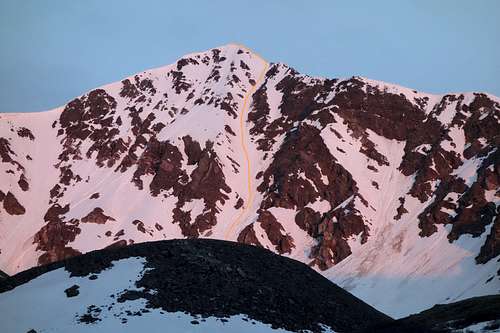
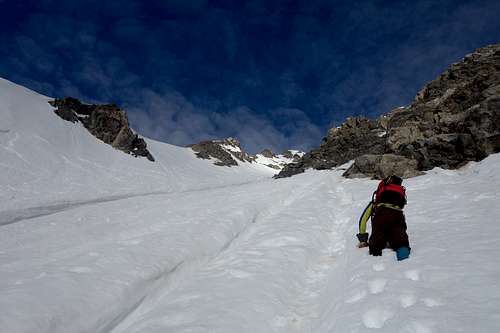
The Dead Dog Couloir is a very popular snow climb on the Front Range. It is also a great expert ski descent. The approximately 50° slopes with a convenient finish near the summit guarantee there will be several groups attempting this route when it is in especially on the weekends.
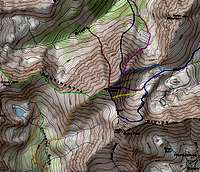
Once on I-70 go to the Bakerville exit #221 (East of the divide) and proceed south on forest service road 189. Look for the brown forest service sign pointing the way to Grays Peak. Depending on road conditions, the clearance of your vehicle and the number of cars in the Stevens Gulch trailhead parking lot, drive about 2 miles to the trailhead. The road can be impacted from avalanche slides so access to the trailhead may be uncertain; it is not maintained during the winter so your vehicle can get stuck.
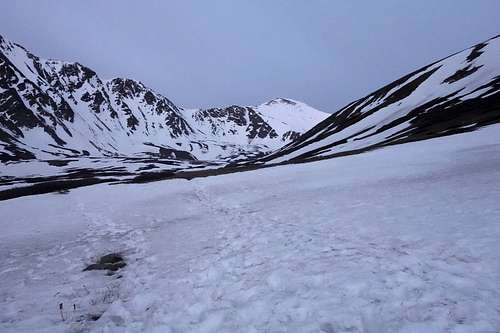
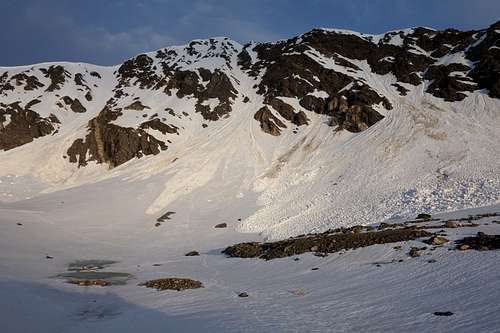
From the Stevens Gulch TH (11,150ft) take the trail that heads towards Grays. Once in the upper valley, at near the base of Grays and Torries, cut over to the base of the obvious couloir that cuts the peak in half. It is 1.5 to 2 hours, at approx 12,000 feet, from the trailhead. Keep in mind that the trail passes the south end of Kelso which can expose you to avalanche danger depending on conditions.
|
|

|
Camping
Climbers often camp near the base of the route to skip the alpine start/drive from Denver. Note the CMC often camps here also as part of their training outings so the route could get crowded on the weekends.
Route Description
Routes

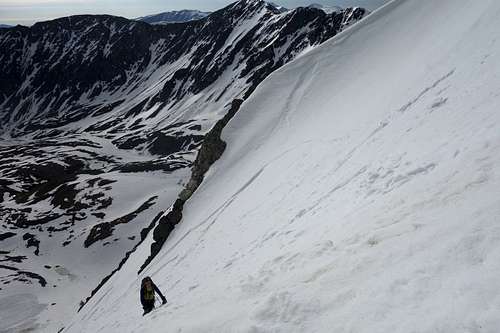
Late Spring Conditions
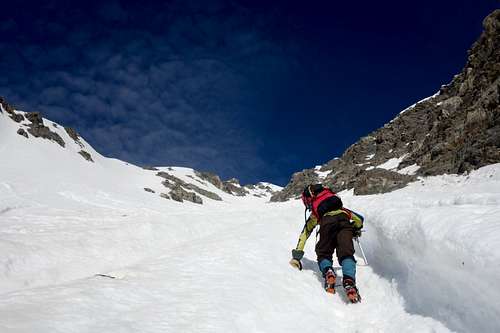
Dead Dog is the obvious line that runs up the middle of Torreys as seen in the picture on the right. The steepest sections are approximately 45 degrees toward the top but very manageable.
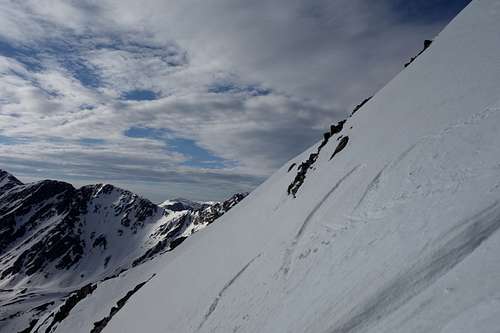
Exit the couloir to the right and join the ridge to the summit. This ridge is the finish of the Kelso route.
Unless you are skiing the safest way off is to descend from Grays.
Essential Gear
1. Take a class on snow climbing.
Not to sound like a crummy commercial, but solid knowledge is a critical part of snow climbing. Doing it right will improve your decision-making and help keep you safer in the process. Despite being a rather straightforward sport, the gear, techniques, and ability to read snow are all important aspects of a successful adventure. Both the Colorado Mountain School and Colorado Mountain Club offer excellent, affordable classes. Mountaineering: Freedom of the Hills remains the benchmark publication for those looking to read up on mountaineering skills.
2. Master the self-arrest.
Using an ice axe (more on those below) to stop a fall is the single most important skill to master for climbing snow couloirs. Stopping a slide with confidence will give climbers an edge in nearly every terrain and situation. Make sure you are using the correct hand position so that you can roll over into the snow and drive the pick in while kicking your feet. Sounds easy? Try it when you are sliding headfirst on your back with a heavy pack or desperately trying to to catch a crampon spike—or worst of all, trying to stop on hard snow or ice. Practice makes perfect: St. Marys Glacier has a year-round snowfield that is a great place to practice self arresting.
3. Start very early.
Snow couloirs are not for the lazy. You should plan to be at the base of your gully before sunrise, which often means either camping out or starting your hike in pre-dawn (also known as the “alpine start”). Early morning snow tends to be firm and consistent, whereas mid-morning and afternoon snow can turn into a slushy mess. Add to that the inevitable thunderstorms that brew daily in the mountains after noon, and you have all the more reason to get out early.
4. Know the forecast.
When aiming for a snow climb, you’ll need to know the normal forecast conditions: rain, lightning, and snow. With snow climbs, however, you want to pay attention to the overnight lows to gauge how well consolidated the morning snow will be, as well as wind conditions. Winds can form dangerous cornices that can break into a couloir as well as amplify avalanche conditions (which are still a slight but possible danger). It’s also good to factor the forecast into your descent. Some couloirs you head back down, while other mountains offer easy walk-offs.
5. Learn to place gear.
Not all snow climbs require ropes and protection, especially those at a slope of 40 degrees or less. But steeper climbs, mixed terrain, and hard snow can all warrant placing protective pieces and using a rope. Some climbs will have placements for traditional rock climbing gear, but in many cases you’ll be placing snow pickets and snow flukes, which are buried in the snow. Besides gear, it’s also worth knowing how to build a safe snow bollard, which is a natural anchor made by looping a rope around a round of carved-out snow.
6. Get comfortable with your crampons.
Crampons are essential to maintaining good grip in the snow, and let's face it: Walking around with sharp metal spikes on your feet is a pretty cool feeling. But crampons are also good at shredding your pants and getting caught and twisting your legs in all sorts of unfortunate angles. And more than one climber has kicked a front point directly into the rope. Learning to use your crampons is key to efficient climbing and this includes being able to put them on and take them off without taking too long—the last place you want to be fumbling with metal spikes is when a lightning storm is closing in.
7. Glissade like a pro.
Not all snow climbs are suited for glissading but when they are, it’s a ton of fun. Using your ice axe as a rudder, a controlled slide can make hundreds of feet of descent go by in seconds. Make sure the slope isn’t too steep, there is a safe run out, and you (and your partners) are in control. Glissading is also a great reason to buy snow pants with a reinforced butt, as spring corn snow can shred nylon (and your skin) with ease.
8. Sometimes, no rope is better.
As mentioned, lesser-angle couloirs can be safer and quicker without a rope. While climbers should be proficient with ropes, it’s also good to know when to leave them in your pack and head up unencumbered. The best conditions for no rope climbing, besides low angle slopes, are soft snow that is easy to self arrest in or shorter, less demanding couloirs.
9. Know the difference between axes.
Snow axes aren’t to be confused with ice axes. Ice axes are shorter, usually curved tools that are used in technical, vertical ice climbing. Snow axes are designed for travel on snow, across glaciers, and couloir climbs—in other words, all-around mountaineering. The length and weight of your snow axe is important (you can learn more about axes here ). One common mistake in Colorado is purchasing a snow axe of the correct length that is superlight or has a small pick and adze. While these axes are good in some applications, they can be too light and flimsy to really bite into snow during a self-arrest. Consider purchasing a snow axe that is burly enough to really grip in a pinch.
10. Pick a good place to start.
One of the best books for snow climbs is Dave Cooper’s Colorado Snow Climbs . If you’re looking for some of the better beginner routes (which are still serious undertakings), consider the Queen’s Way Couloir on Apache Peak (Indian Peaks), the Crooked Couloir on Mount Audubon (Indian Peaks), Edwardian Couloir on Mount Edwards (Front Range), or Lost Rat Couloir on Grays Peak (Front Range). For intermediate climbs, consider the Dragon’s Tail on Flattop Mountain (Rocky Mountain National Park, Front Range), Skywalker Couloir on South Arapahoe Peak (Indian Peaks), Dead Dog on Torreys Peak (Front Range), or the Juliet Couloir on Mount Neva (Indian Peaks).
Originally written by RootsRated (James Dziezynski)
External Links
- Youtube